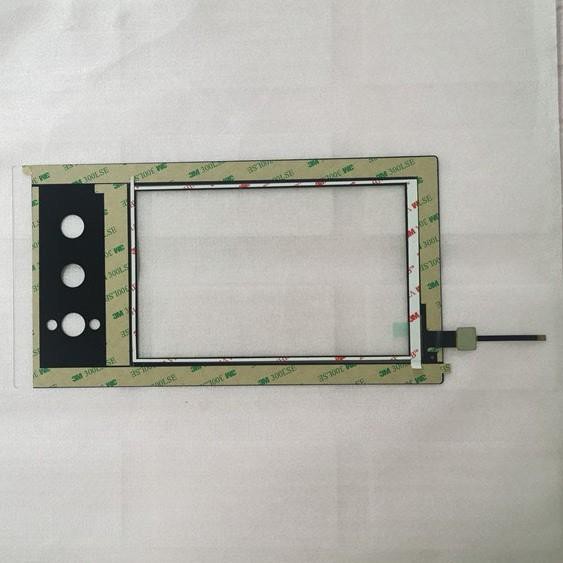
Calibrating an LCM (Liquid Crystal Module) LCD display is a crucial process that ensures optimal performance and accurate visual representation. As an experienced LCM LCD display supplier, I understand the significance of calibration in delivering high-quality products to our customers. In this blog post, I will guide you through the steps of calibrating an LCM LCD display, share some tips and best practices, and highlight the importance of calibration in various applications.
Why Calibration Matters
Before diving into the calibration process, it's essential to understand why calibration is necessary. An LCM LCD display consists of multiple components, including the LCD panel, backlight, and driver IC. These components can have slight variations in their characteristics, such as color temperature, contrast ratio, and brightness. Calibration helps to compensate for these variations and ensures that the display accurately reproduces colors, contrasts, and brightness levels.
In addition to improving visual quality, calibration also plays a vital role in ensuring consistency across multiple displays. This is particularly important in applications where multiple displays are used side by side, such as digital signage, industrial control panels, and medical equipment. By calibrating each display to the same standards, you can ensure that the overall visual experience is seamless and uniform.
Step-by-Step Guide to Calibrating an LCM LCD Display
Now that we understand the importance of calibration, let's walk through the step-by-step process of calibrating an LCM LCD display.
Step 1: Prepare the Display and Calibration Tools
Before you begin the calibration process, you need to ensure that the display is properly set up and the calibration tools are ready. Here's what you'll need:


- LCM LCD display: Make sure the display is powered on and functioning properly.
- Calibration software: There are several calibration software options available, both free and paid. Choose a software that is compatible with your display and calibration hardware.
- Calibration hardware: Depending on the calibration software you choose, you may need a calibration device, such as a colorimeter or a spectrophotometer. These devices measure the color and brightness characteristics of the display and provide feedback to the calibration software.
- Test patterns: Many calibration software packages include test patterns that you can use to evaluate the display's performance. These patterns typically include solid colors, gradients, and test images.
Step 2: Set the Display to its Default Settings
Before you start the calibration process, it's a good idea to set the display to its default settings. This ensures that you are starting from a known baseline and eliminates any previous calibration settings that may affect the results. To set the display to its default settings, refer to the display's user manual or use the on-screen menu.
Step 3: Measure the Display's Characteristics
Once the display is set to its default settings, you can start measuring its characteristics using the calibration hardware and software. Here's how:
- Connect the calibration hardware: Follow the instructions provided with the calibration hardware to connect it to your computer and the display.
- Launch the calibration software: Open the calibration software and follow the on-screen instructions to set up the calibration process.
- Run the calibration measurements: The calibration software will guide you through a series of measurements, including color temperature, contrast ratio, brightness, and gamma. Follow the instructions carefully and make sure the calibration hardware is positioned correctly on the display.
- Record the measurement results: The calibration software will display the measurement results on the screen. Record these results for future reference.
Step 4: Adjust the Display Settings
Based on the measurement results, you can now adjust the display settings to optimize its performance. Here are some of the settings that you may need to adjust:
- Color temperature: Color temperature refers to the perceived warmth or coolness of the colors on the display. Most calibration software allows you to adjust the color temperature to match a specific standard, such as D65 (6500K), which is a common standard for daylight.
- Contrast ratio: Contrast ratio refers to the difference between the brightest and darkest colors that the display can produce. Adjust the contrast ratio to ensure that the display has a good balance between bright and dark colors.
- Brightness: Brightness refers to the overall level of light emitted by the display. Adjust the brightness to ensure that the display is visible in the intended environment.
- Gamma: Gamma refers to the relationship between the input signal and the output brightness of the display. Adjust the gamma to ensure that the display accurately reproduces the brightness levels of the source image.
Step 5: Verify the Calibration Results
Once you have adjusted the display settings, you need to verify the calibration results to ensure that the display is performing as expected. Here's how:
- Run the calibration measurements again: Use the calibration hardware and software to run the calibration measurements again. Compare the new measurement results with the previous results to ensure that the display settings have been adjusted correctly.
- View test patterns and images: Use the test patterns and images provided by the calibration software to evaluate the display's performance. Look for any color inaccuracies, banding, or other visual artifacts.
- Compare the display with a reference display: If possible, compare the calibrated display with a reference display that is known to be accurately calibrated. This can help you identify any remaining issues and ensure that the calibrated display is consistent with the reference display.
Tips and Best Practices for Calibrating an LCM LCD Display
Here are some tips and best practices to help you achieve the best results when calibrating an LCM LCD display:
- Calibrate the display regularly: Over time, the characteristics of the display may change due to factors such as aging, temperature, and humidity. To ensure consistent performance, it's a good idea to calibrate the display regularly, especially in critical applications.
- Use high-quality calibration hardware and software: The accuracy of the calibration results depends on the quality of the calibration hardware and software. Invest in high-quality equipment to ensure accurate and reliable calibration.
- Calibrate the display in a controlled environment: The calibration results can be affected by the ambient light and temperature in the environment. To ensure accurate results, calibrate the display in a controlled environment with minimal ambient light and stable temperature.
- Follow the manufacturer's instructions: Different displays may have different calibration requirements and procedures. Always follow the manufacturer's instructions when calibrating the display to ensure that you are using the correct settings and procedures.
Applications of Calibrated LCM LCD Displays
Calibrated LCM LCD displays are used in a wide range of applications, including:
- Digital signage: In digital signage applications, calibrated displays ensure that the content is displayed accurately and consistently across multiple screens. This is particularly important in applications such as retail stores, airports, and stadiums, where the visual impact of the signage is crucial.
- Industrial control panels: In industrial control panels, calibrated displays provide accurate and reliable information to operators. This is essential for ensuring the safety and efficiency of industrial processes.
- Medical equipment: In medical equipment, calibrated displays are used to display critical patient information, such as vital signs and diagnostic images. Accurate calibration is essential for ensuring the accuracy and reliability of the information displayed on the screen.
- Gaming and entertainment: In gaming and entertainment applications, calibrated displays provide a more immersive and realistic visual experience. This is particularly important in applications such as virtual reality (VR) and augmented reality (AR), where the visual quality is crucial.
Conclusion
Calibrating an LCM LCD display is a crucial process that ensures optimal performance and accurate visual representation. By following the steps outlined in this blog post and using the tips and best practices provided, you can achieve accurate and reliable calibration results. As an LCM LCD display supplier, we are committed to providing high-quality products and services to our customers. If you have any questions or need assistance with calibrating your LCM LCD display, please don't hesitate to [contact us for procurement and further discussion]. We look forward to working with you to meet your display needs.
References
- [Name of the calibration software used], [Publisher], [Year of publication]
- [Name of the display's user manual], [Manufacturer], [Year of publication]
- [Name of the industry standard for display calibration], [Standard organization], [Year of publication]


