


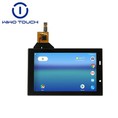


Capactive Touch Panel


Product parameters
|
Model Number |
CCX035FF0336 |
| Structure |
Glass+Glass |
|
Cover Glass VA |
49.56*74.04 mm |
|
Cover Lens Dimension |
82.80*93.40 mm |
|
Surface Hardness |
≥6H |
|
Transparency |
≥85% |
|
IC |
FT5306 |
|
Interface of CTP |
IIC |
|
Touch Points |
10 |
| Operating Temperature |
–20℃~70℃ ≤90%RH |
|
Storage Temperature |
–20℃~70℃ ≤90%RH |
Touchscreen devices
Connecting Monitors via HDMI and USB: A Comprehensive Guide
In today's tech-savvy world, having a reliable and efficient monitor setup is crucial for productivity and convenience. Whether you're setting up a home office, gaming station, or creative workspace, understanding how to connect monitors effectively can make a significant difference. In this article, we'll explore the ins and outs of connecting monitors via HDMI and USB, as well as considerations for wall mounting.
1. Connecting Monitors Using USB
1.1 USB to HDMI Adapters
Why USB? While HDMI and other display ports are common choices, USB connections offer simplicity and versatility. Most modern computers come equipped with USB ports, making it a convenient option.
USB Versions: Look for USB 3.0 Type-A ports, as they provide faster data transfer speeds (up to 750 megabytes per second) compared to USB 2.0. USB 3.0 is ideal for smooth video playback.
Identifying USB 3.0: USB 3.0 ports are distinguishable by their blue color and the "SS" (Super Speed) label. They also have nine contact pads, whereas USB 2.0 ports have only four.
USB to HDMI: To connect your monitor via USB, you'll need a USB to HDMI adapter. These adapters support video resolutions of up to 1080p and 2160p.
1.2 Daisy Chaining Monitors
Expanding Display Space: If you need more screen real estate, consider daisy chaining two monitors together. However, this method requires specific ports:
DisplayPort v1.2: Use DisplayPort for daisy chaining. Ensure that all devices and cables support DisplayPort v1.2 or higher.
Thunderbolt: MacBooks support Thunderbolt daisy chaining. Connect the first monitor via Thunderbolt, and then add additional monitors using Thunderbolt connections.
2. Wall Mount Considerations
Space Optimization: Wall mounting monitors frees up desk space and provides a clean, clutter-free look.
Choosing the Right Wall Mount:
VESA Compatibility: Ensure your monitor has VESA mounting holes on the back. Most monitors do, allowing you to use standard VESA mounts.
Tilt and Swivel: Consider adjustable mounts that allow tilting and swiveling for optimal viewing angles.
Cable Management: Look for mounts with built-in cable management to keep cords organized.
Installation Steps:
Locate Studs: Use a stud finder to locate wall studs for secure mounting.
Attach Mount: Install the wall mount bracket using appropriate screws.
Attach Monitor: Securely attach your monitor to the mount.
Adjust and Enjoy: Adjust the tilt and swivel angles as needed.
3. Conclusion
Connecting monitors via HDMI and USB opens up a world of possibilities. Whether you're working, gaming, or streaming content, understanding these connections ensures a seamless experience. Additionally, wall mounting provides an elegant solution for decluttering your workspace. So go ahead, set up your monitors, and enjoy enhanced productivity!


Hot Tags: 4.3 " capactive touch screen connecting monitors using usb, China, suppliers, manufacturers, factory, best, price, 3 5inch OLED Display, Hdmi Capacitive Touch Screen, Capacitive Touch Foil, innolux display, lcd screen layers, 0 9inch Smart Watch 3D Touch Screen